
Most projects start with me wandering about a lumber yard, hoping to find a piece of wood that will inspire a piece of furniture. Gilmer Wood in Portland is one of these places. Often the cabinets I make are very delicate, and, given my tendency to work with shop-cut veneer, I often only need a very small plank of some special wood to build a cabinet. The HVD Cabinet is built from repeatedly book-matched Makore. Makore is a dark red wood from Africa. I had seen in a few years ago during one of my trips to Gilmer and purchased it - not knowing right away what I would do with it - but knowing it would prove useful.
Stacks of wood at Gilmer.
The first step is to break down the small piece of wood into very thin slices, or veneers. I cut these to around 1/16th of an inch. I will then decided how I want them laid out, before bonding them to a substrate - typically baltic birch plywood.

Above, is a layout of left side of the cabinet, left door, right door, and right side of the cabinet.
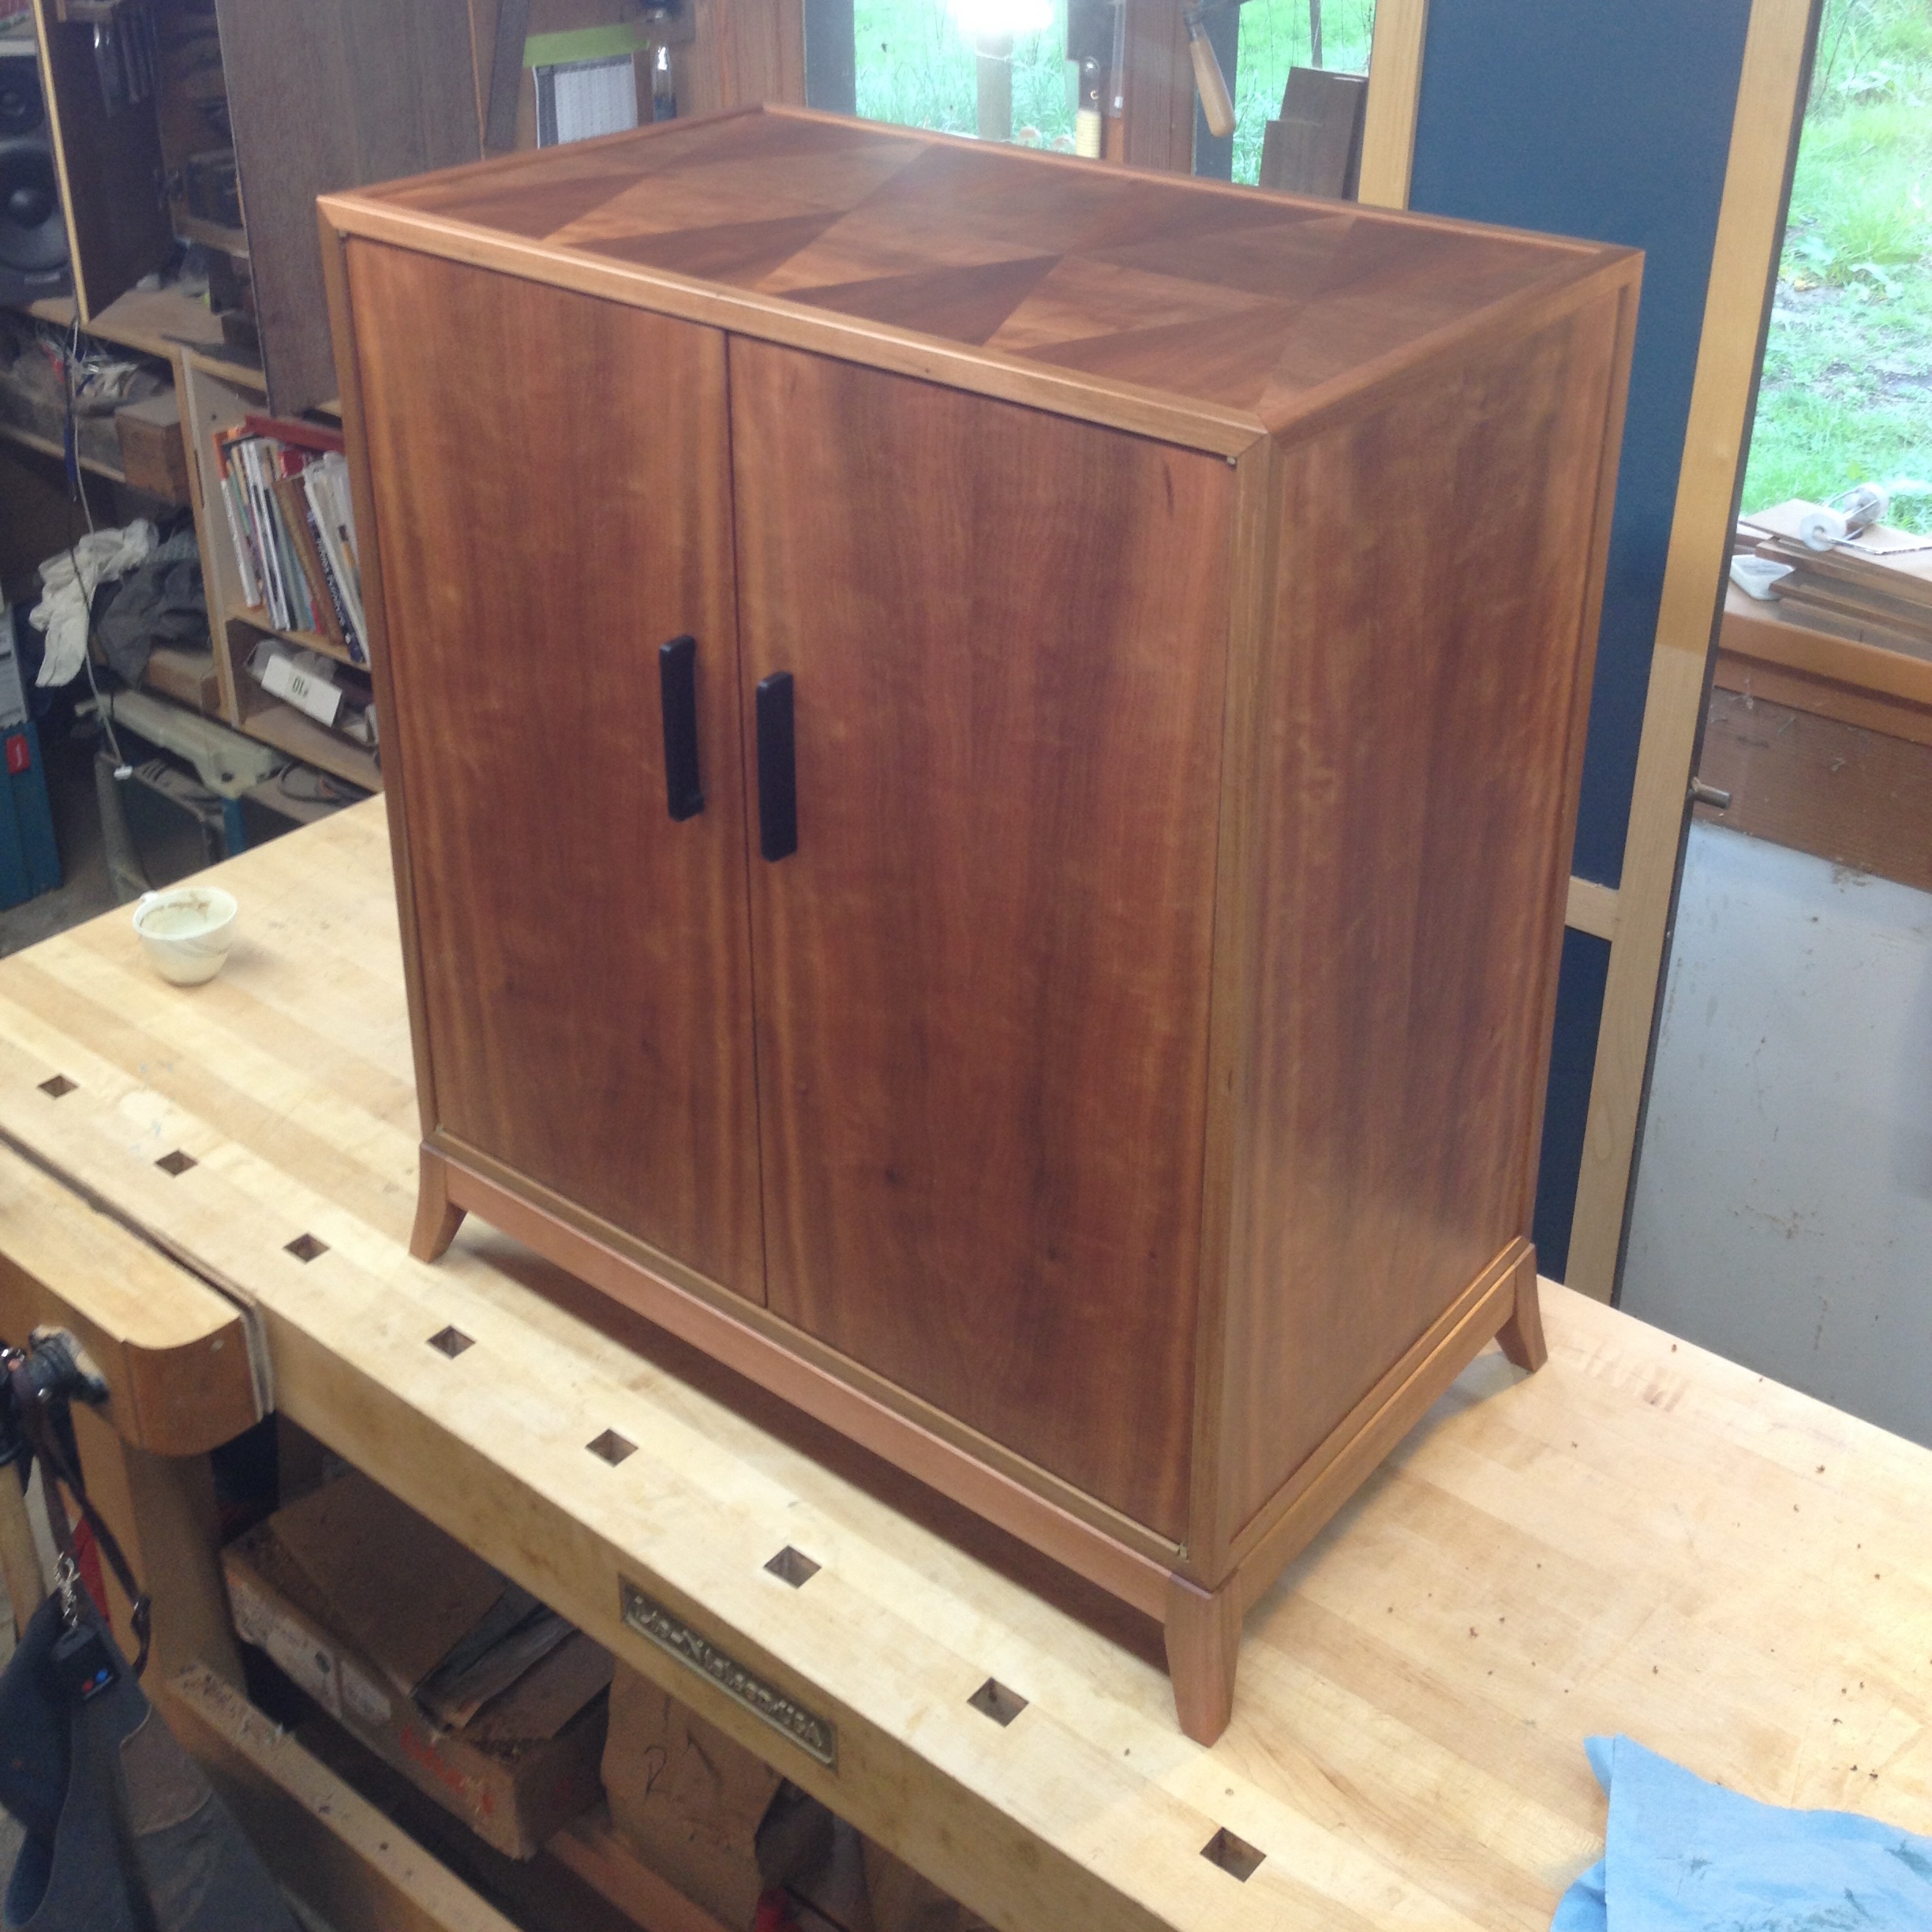
For this project, I wanted to really celebrate the grain and figure of the Makore plank. So I designed the cabinet to the veneer panels would repeat over and over as the make their way around the cabinet body.

With the repeating pattern in place along the sides of the cabinet, I had to decide what to do with the grain for the top. I didn't want a perpendicular junction of grain, so I elected to do a bit of parquetry - allowing the side grain to come up to the top in a triangle pattern.

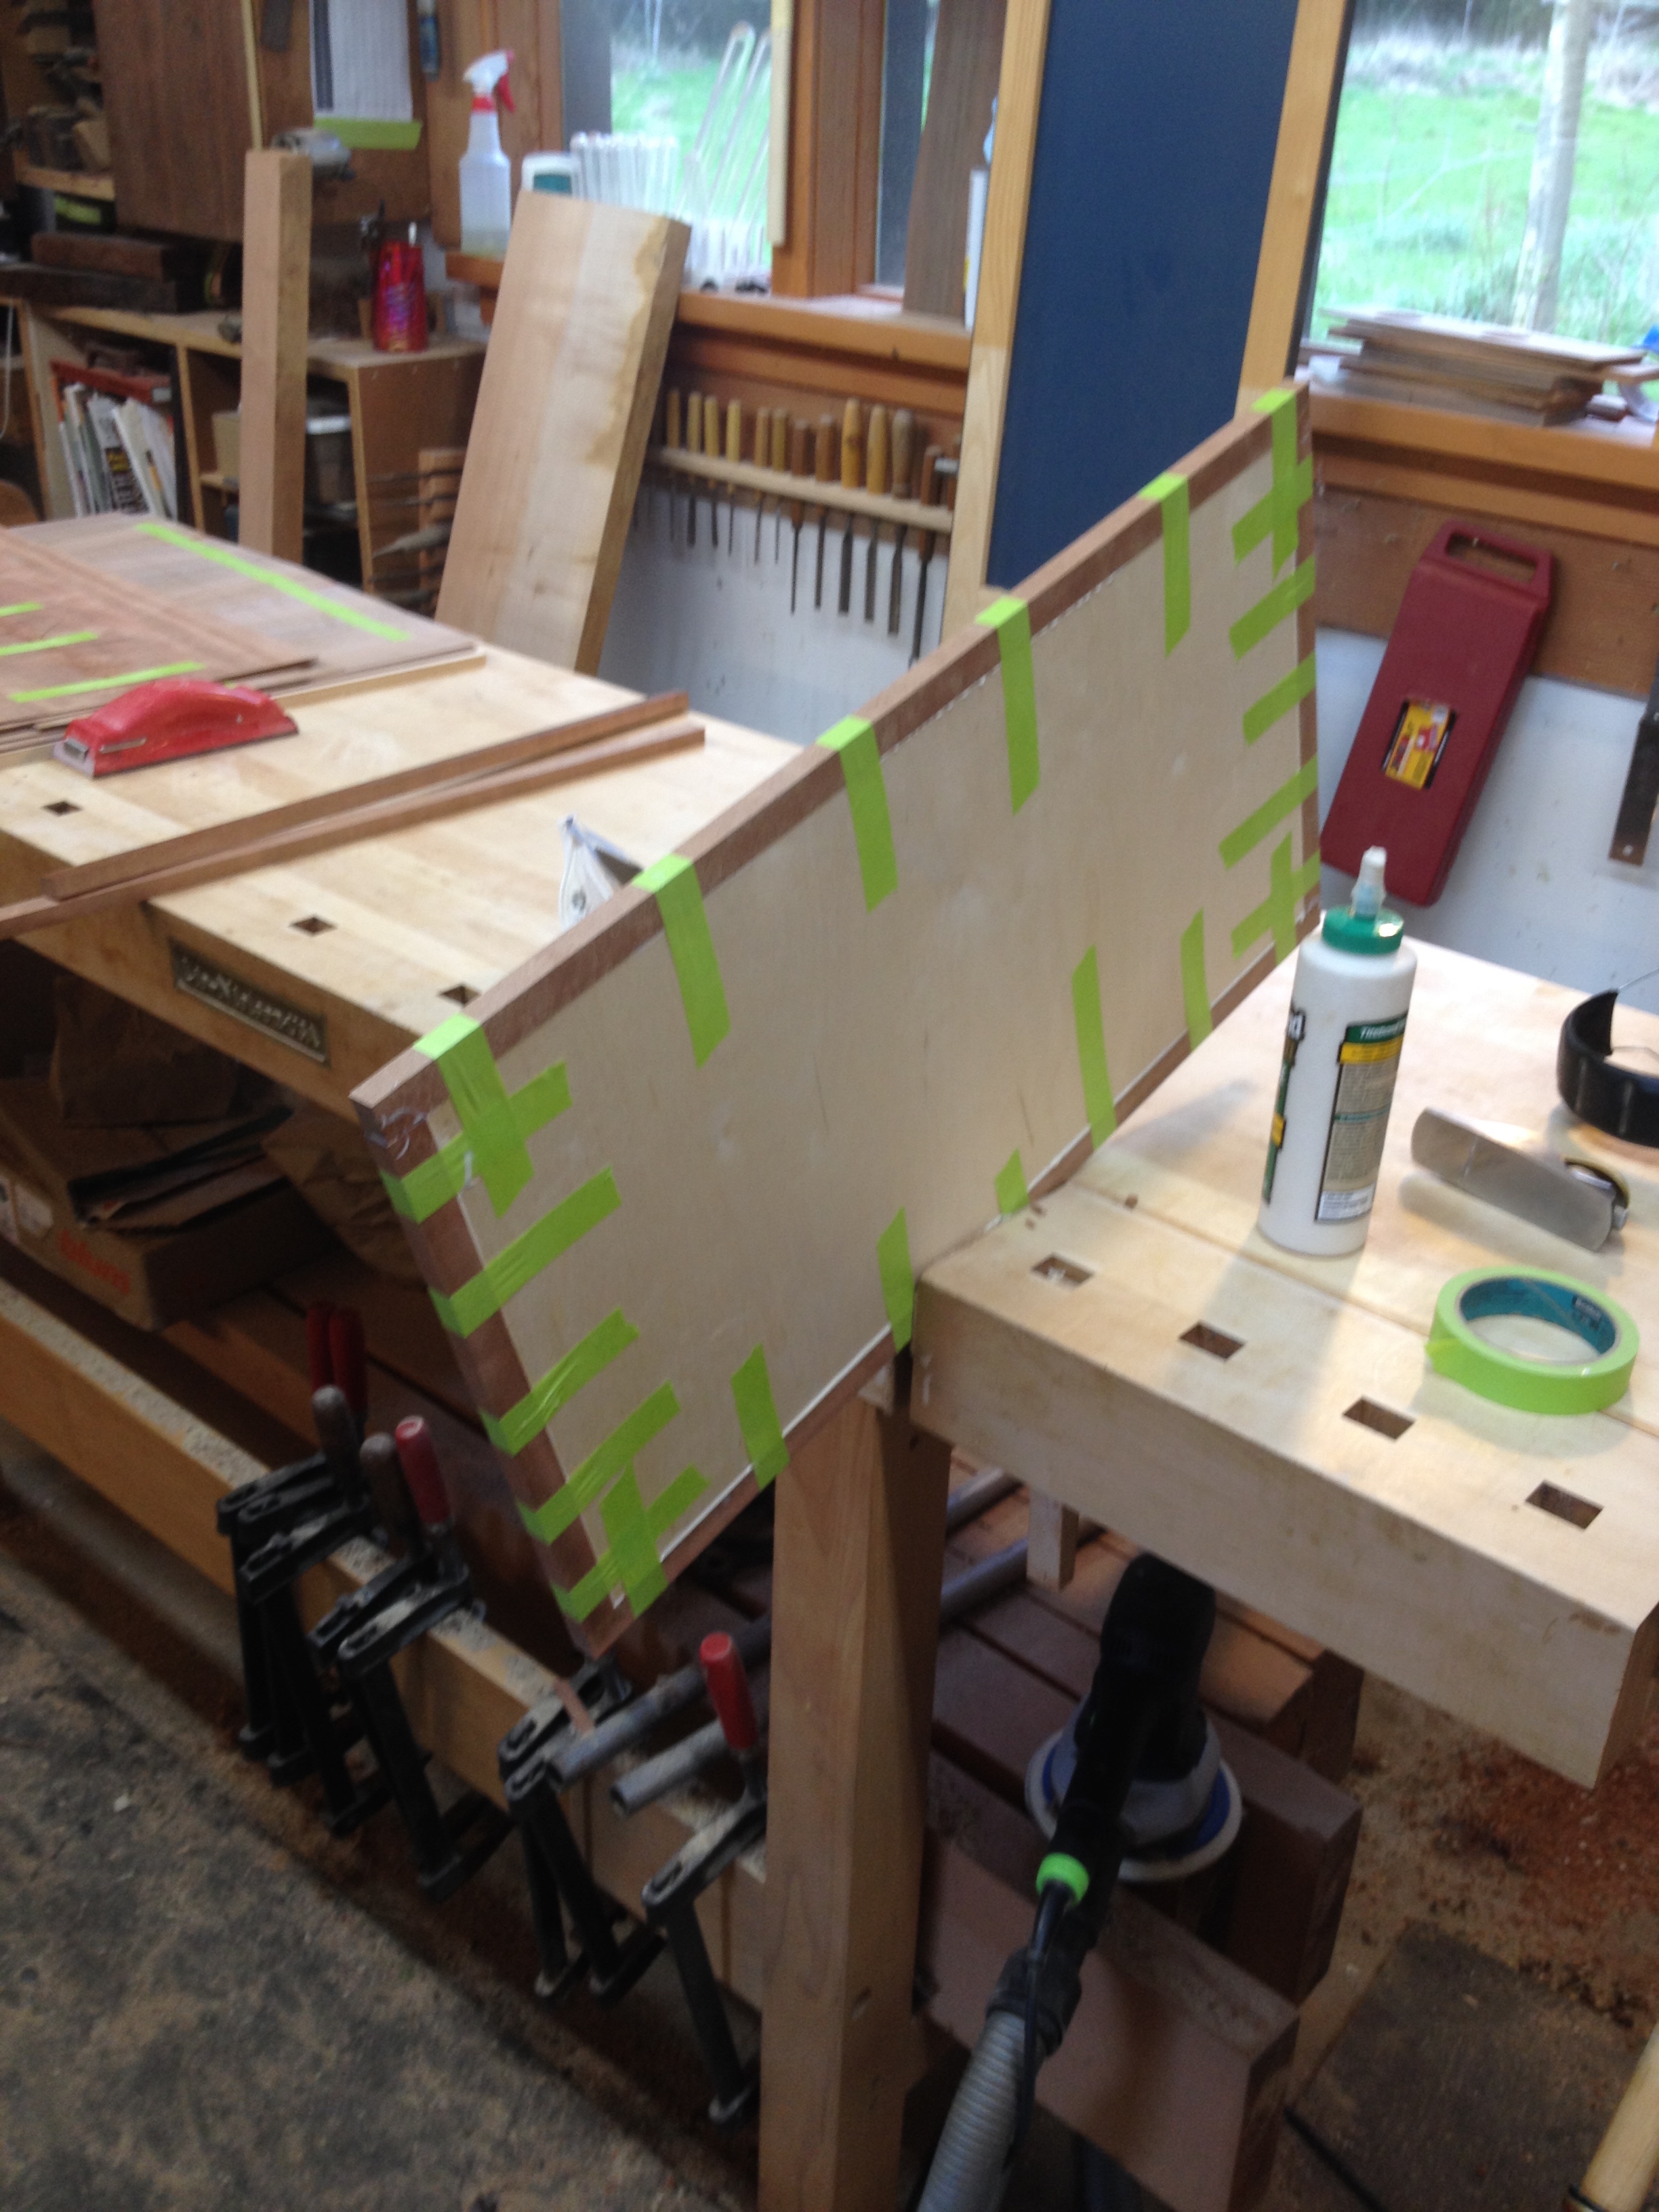
Each piece of veneer is cut to rough size on the table saw or bandsaw and then hand-planed to exact size with the help of my shooting board and low angle bench plane. Once I have the pieces planed to just where I want them, I pull out the glue and green tape.

I have now glued and taped all of the joints together. These will be bonded to a baltic birch substrate.
Baltic birch with Makore edging.

Now out of the vacuum press, you can see the triangular parquetry pattern. This pattern allows the grain from the sides to all converge on the top without any perpendicular grain switches. The banding is Madrone, which I chose for its very dense grain - a nice contrast to the openness of the Makore, but with a pleasing similarity of color.
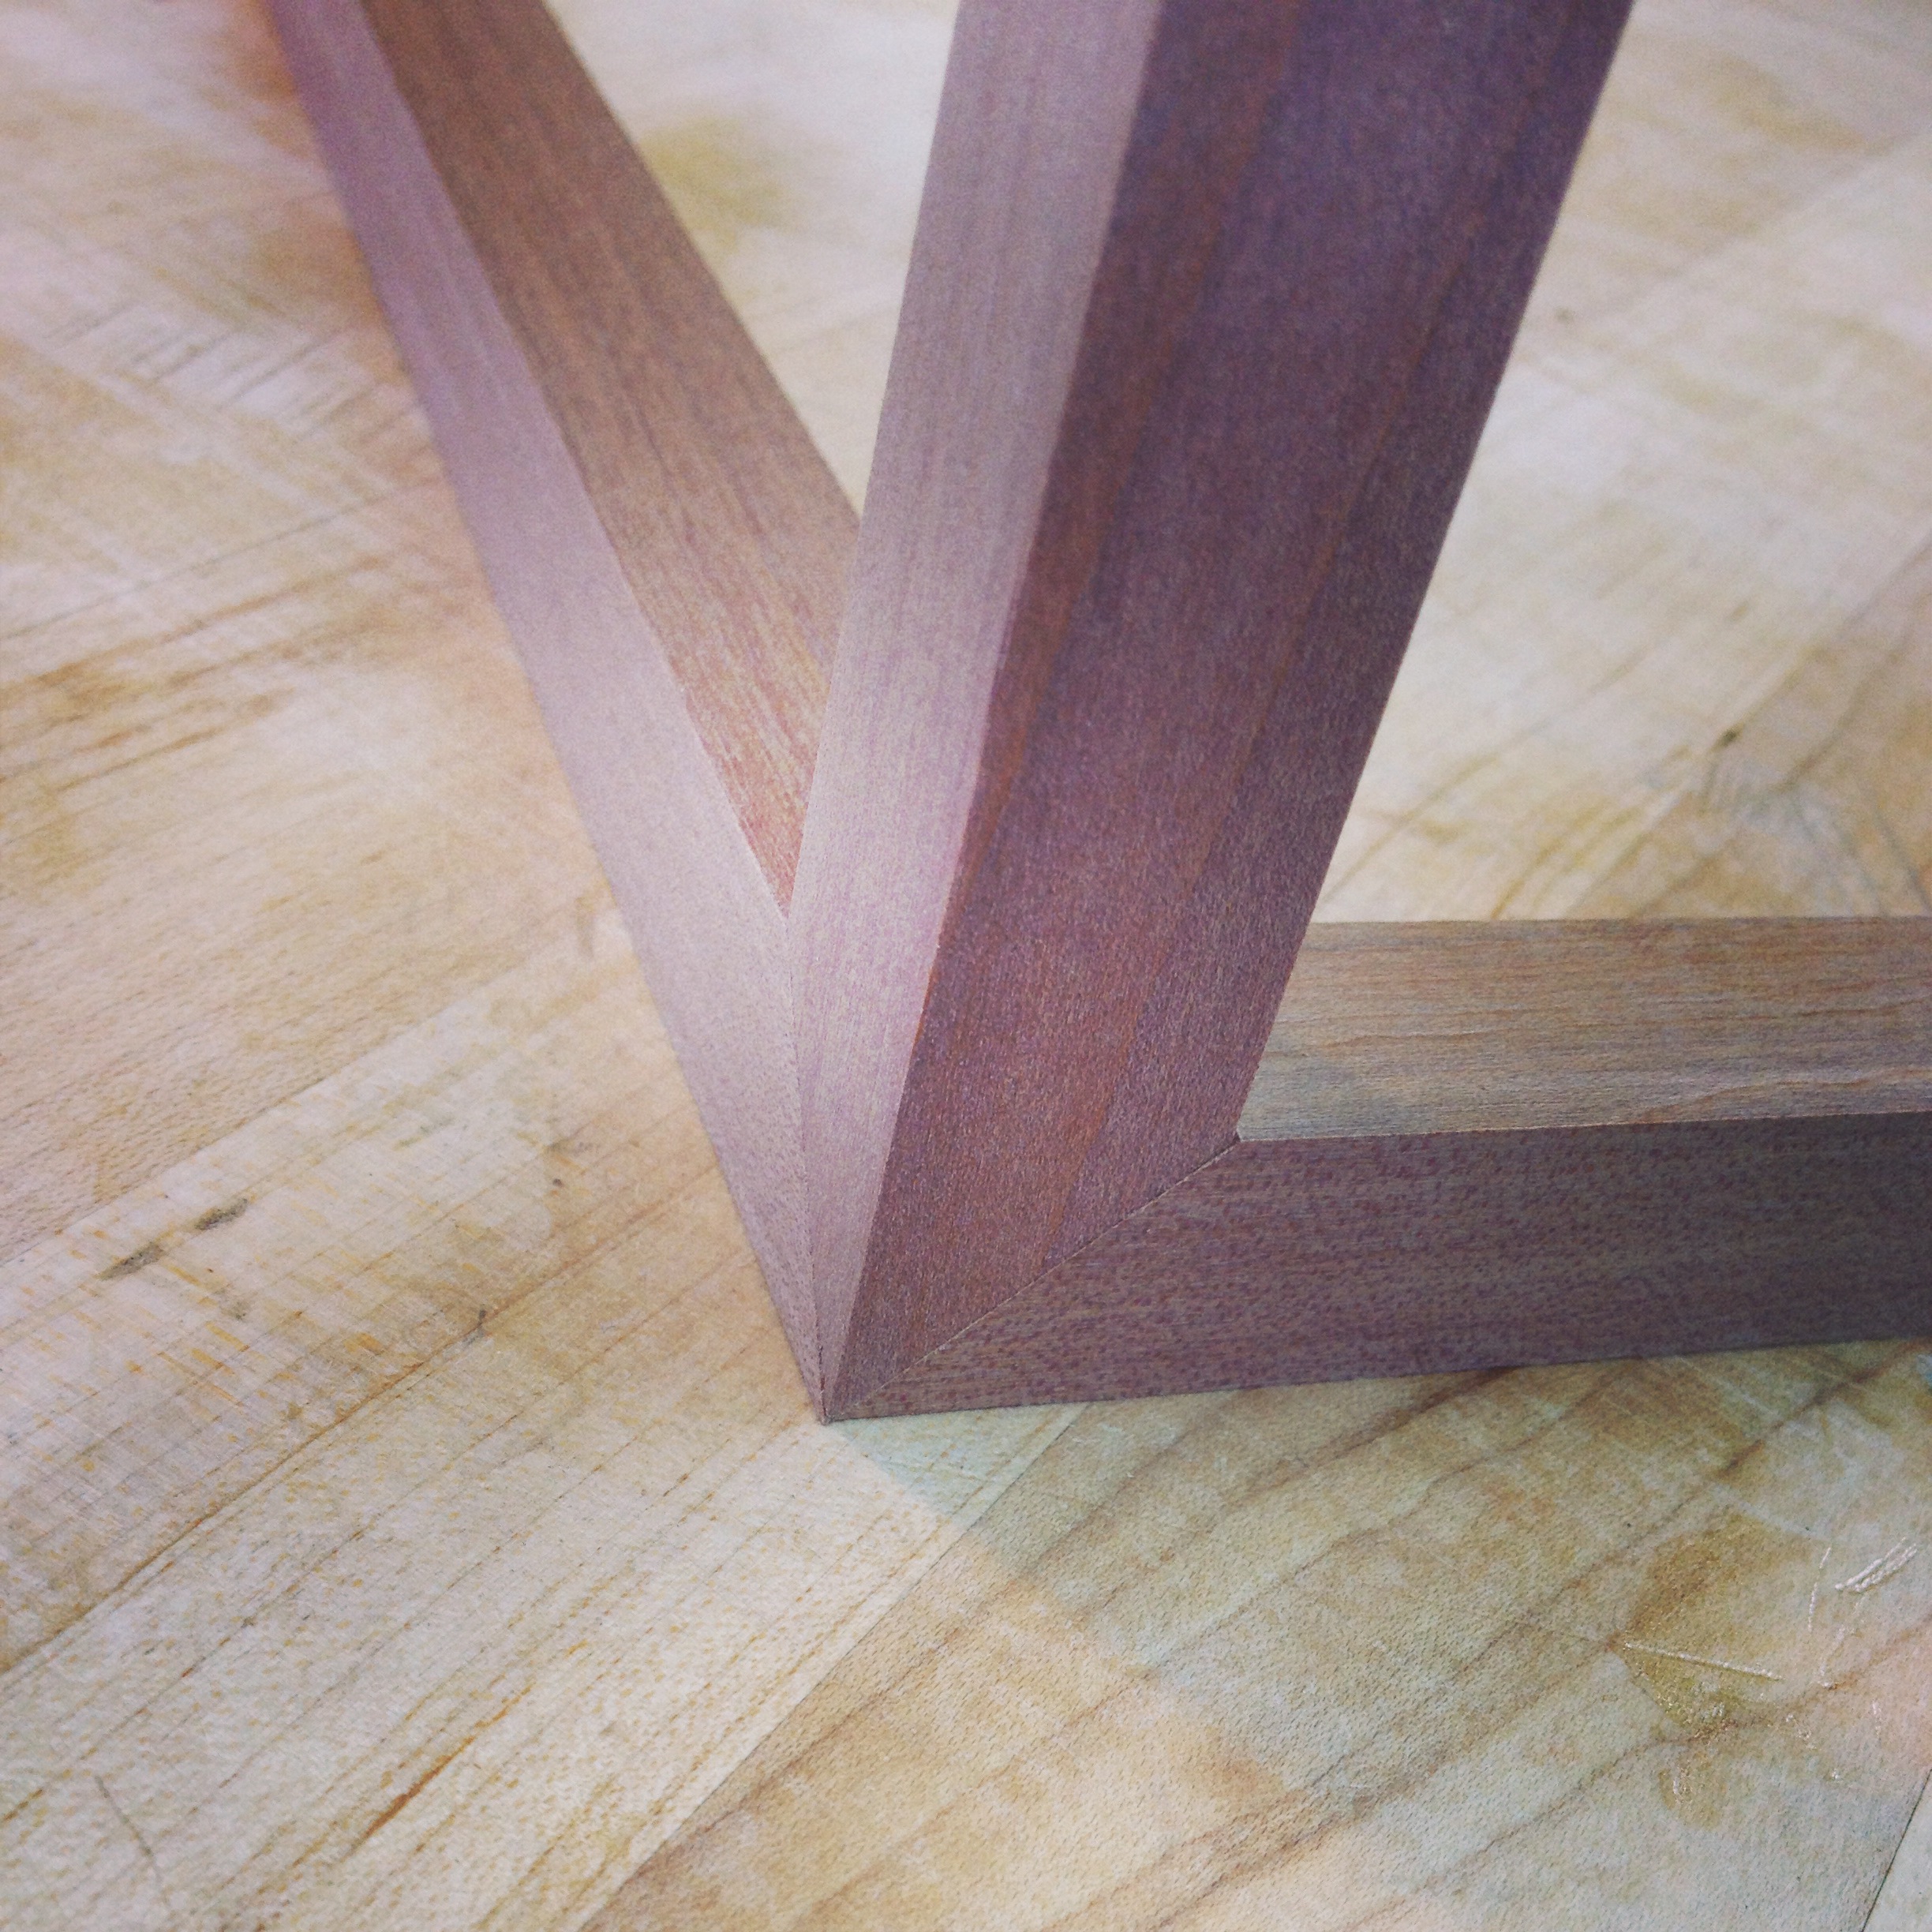
I wanted the edging of the cabinet body to be very minimal, so as to allow for the Makore to be the real showpiece. At it's core, this is still a frame and panel cabinet, but I have reduced the frame to a small bead of Madrone that wraps around all of the edges. In order to give it a very clean junction, I chose a three way miter joint for the corners.

With the glue-up complete, it was now time to turn my attention to the doors. As you can see above, the inside of the cabinet is different from the outside, it is Madrone.

Hand-planing the doors to an exact fit.
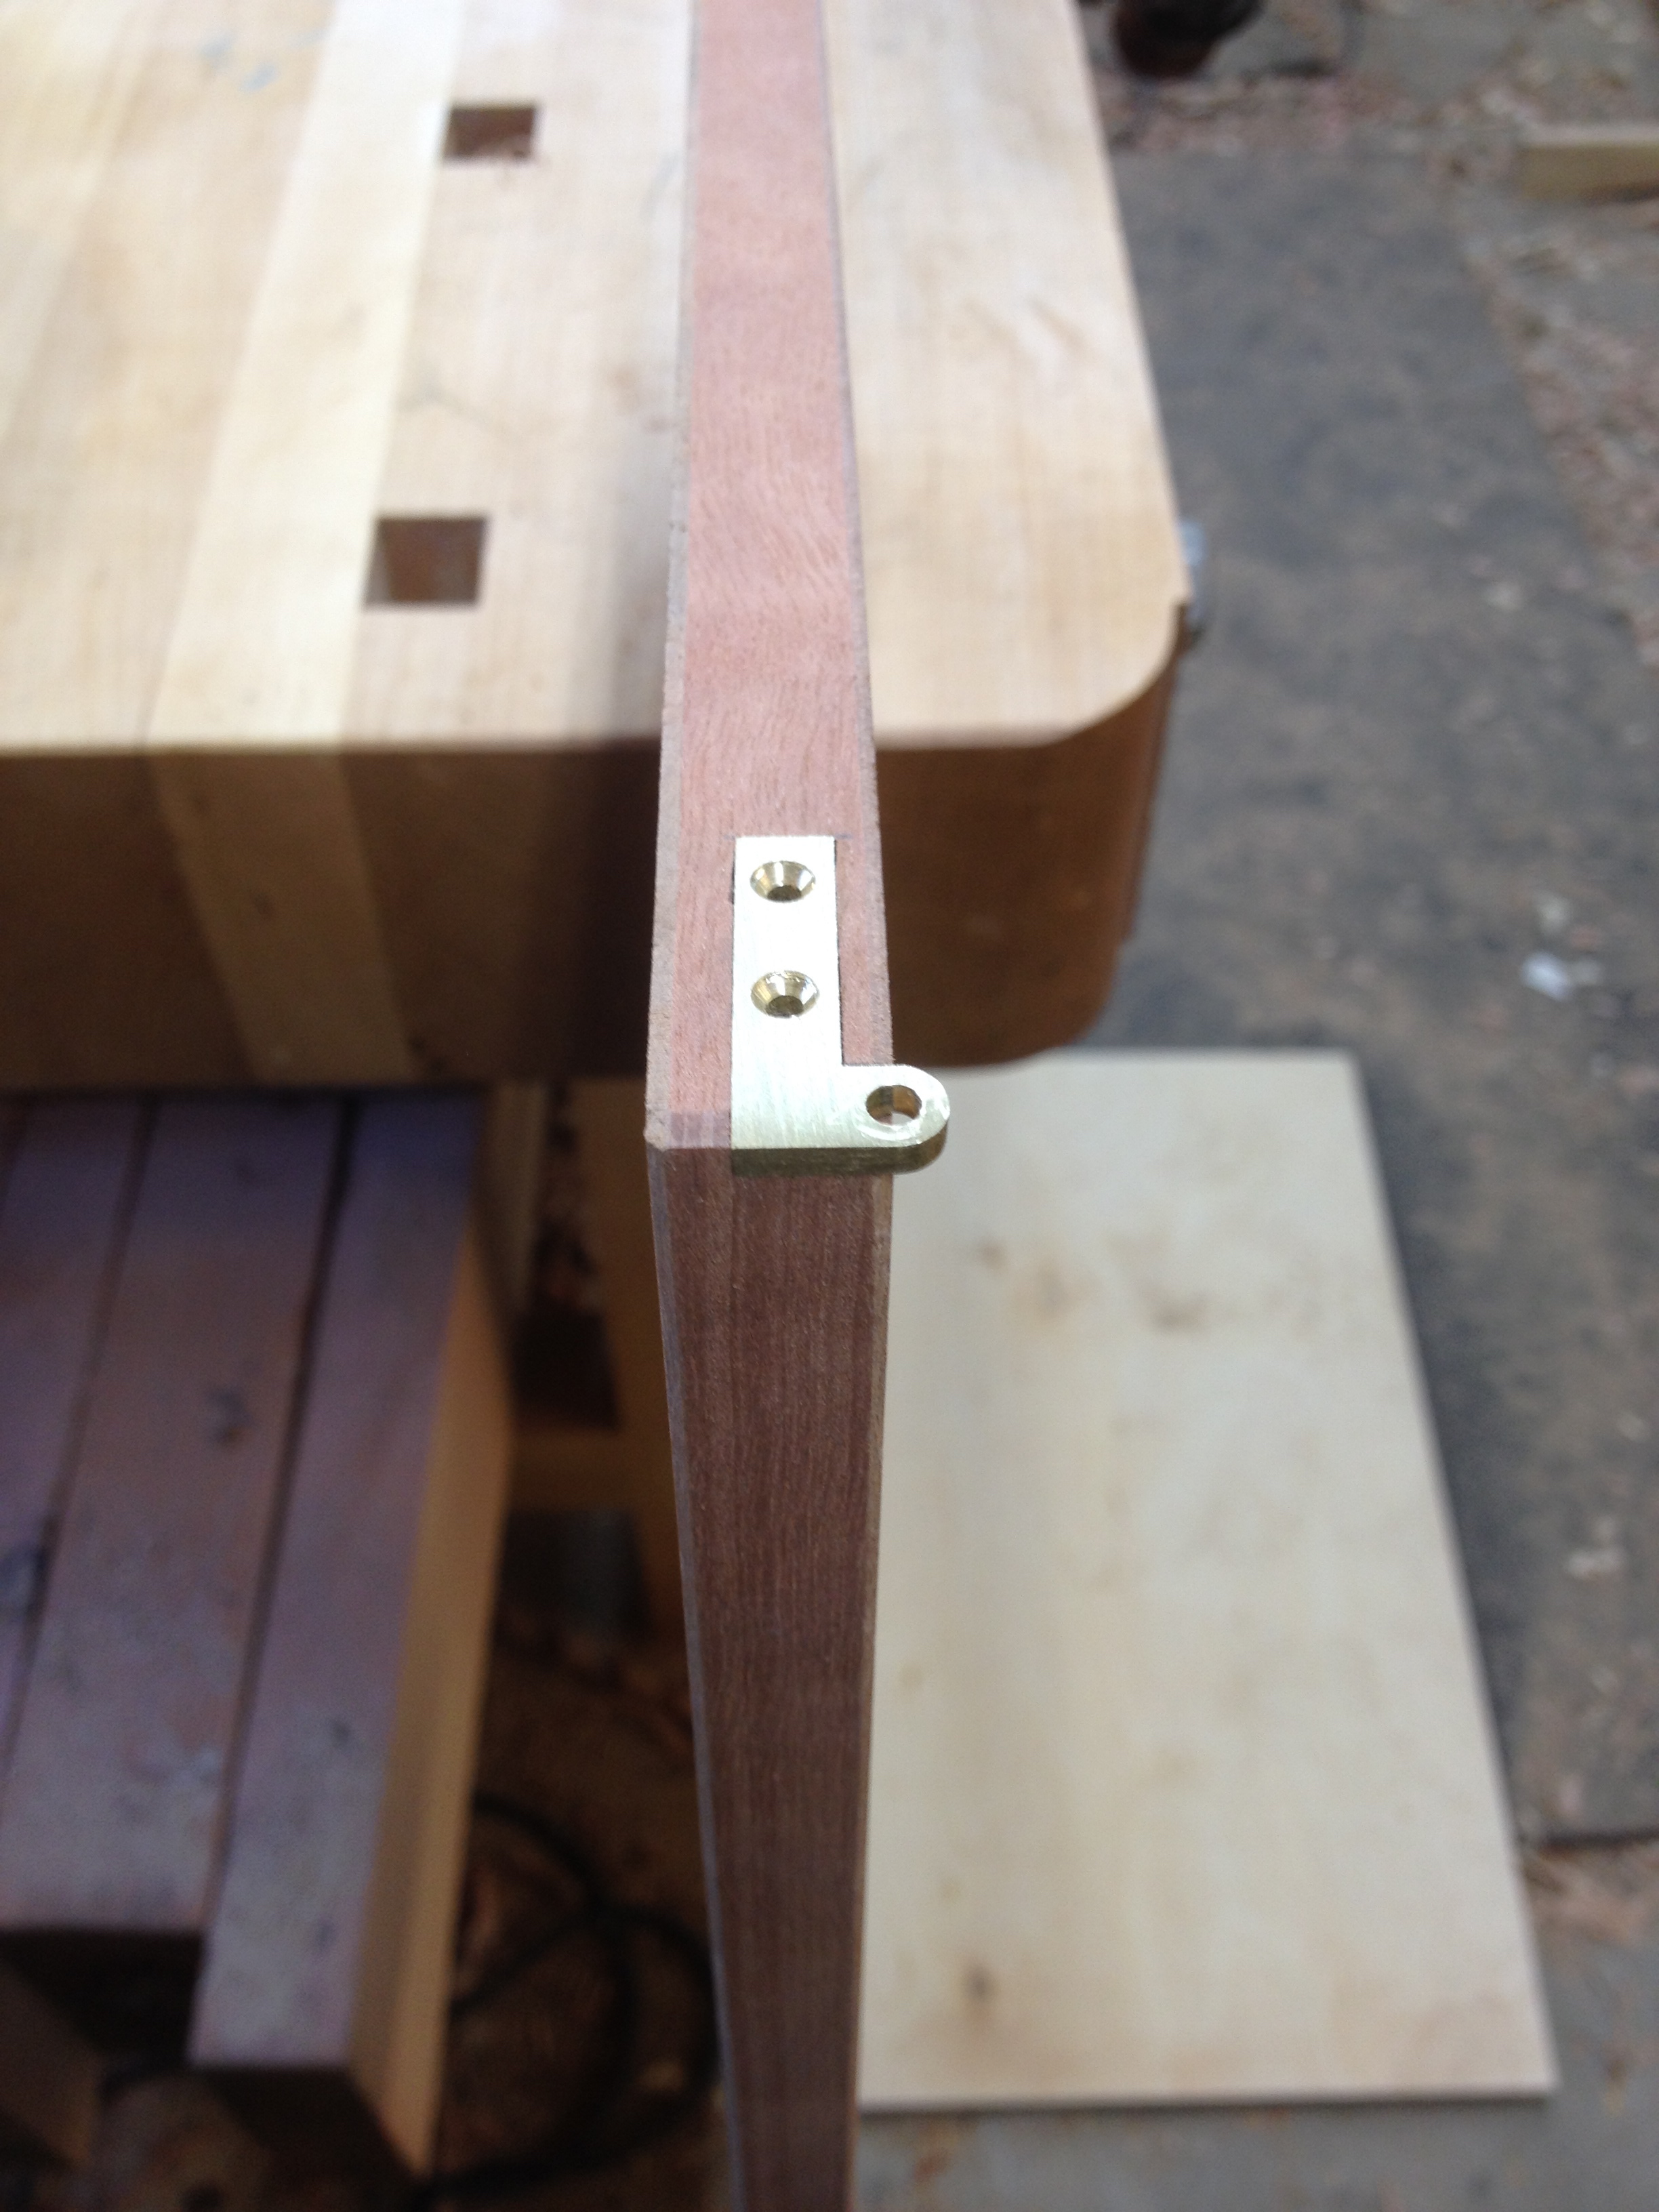
Fitting the "L" style knife hinge into it's mortise.

Now the doors have been fit, I can look to the inside of the cabinet. Also, the base has been built. I like to do this before fitting the doors so I know how the cabinet will rest. I want to fit the doors to the way it is on it's base, not the way it is sitting on my bench.

Shaping the feet with my spokeshave.
I really enjoy projects that allow for drawers. I hand-cut all of my joinery on drawers, as I think it provides better strength, and has far more visual appeal. It is a time where I can actually listen to music or podcasts without the interruption of a giant vacuum system and industrial tools turning on and off. It's peaceful and also rewarding to see joinery come together with just a small saw and some very sharp chisels.

Half-blind dovetail in Koa.

The cabinet is really coming together at this point. The drawers have been cut and fit, the shelf, the divider and the drawer boxes are finished and glued in. Now is when I have to decide what to do about handles.

This is me... scratching my head to come up with a fitting door and drawer handle design.
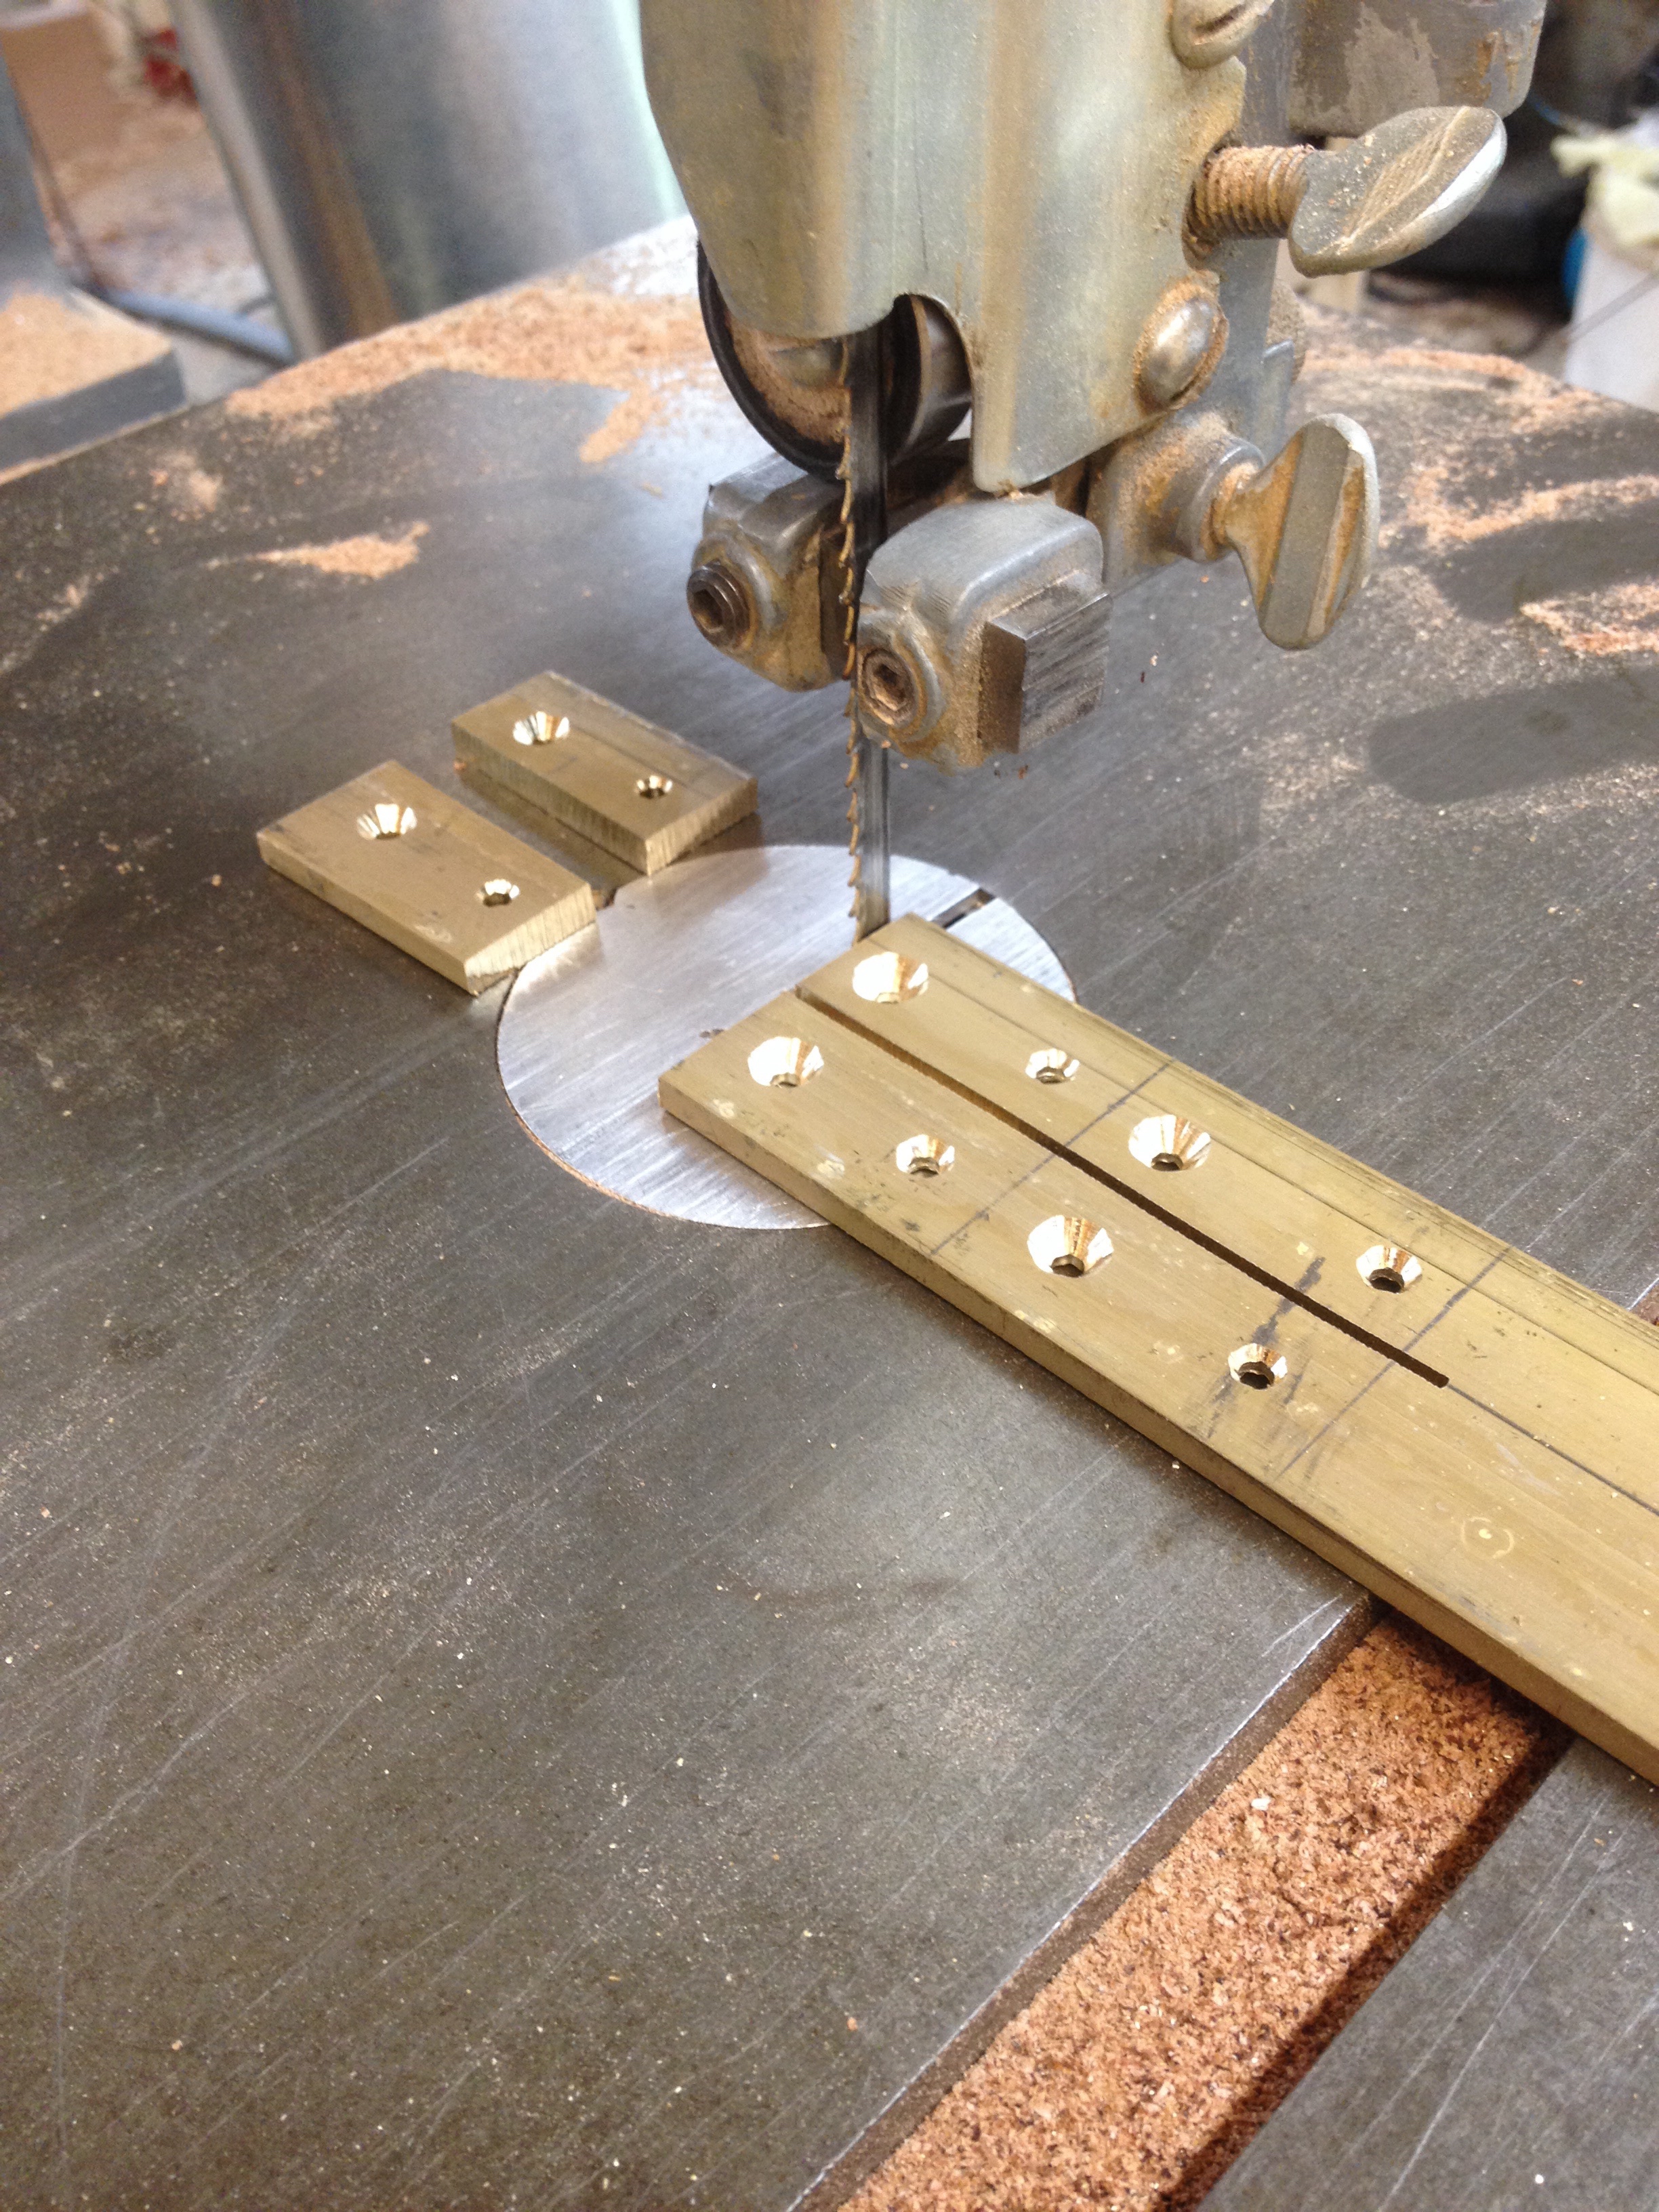
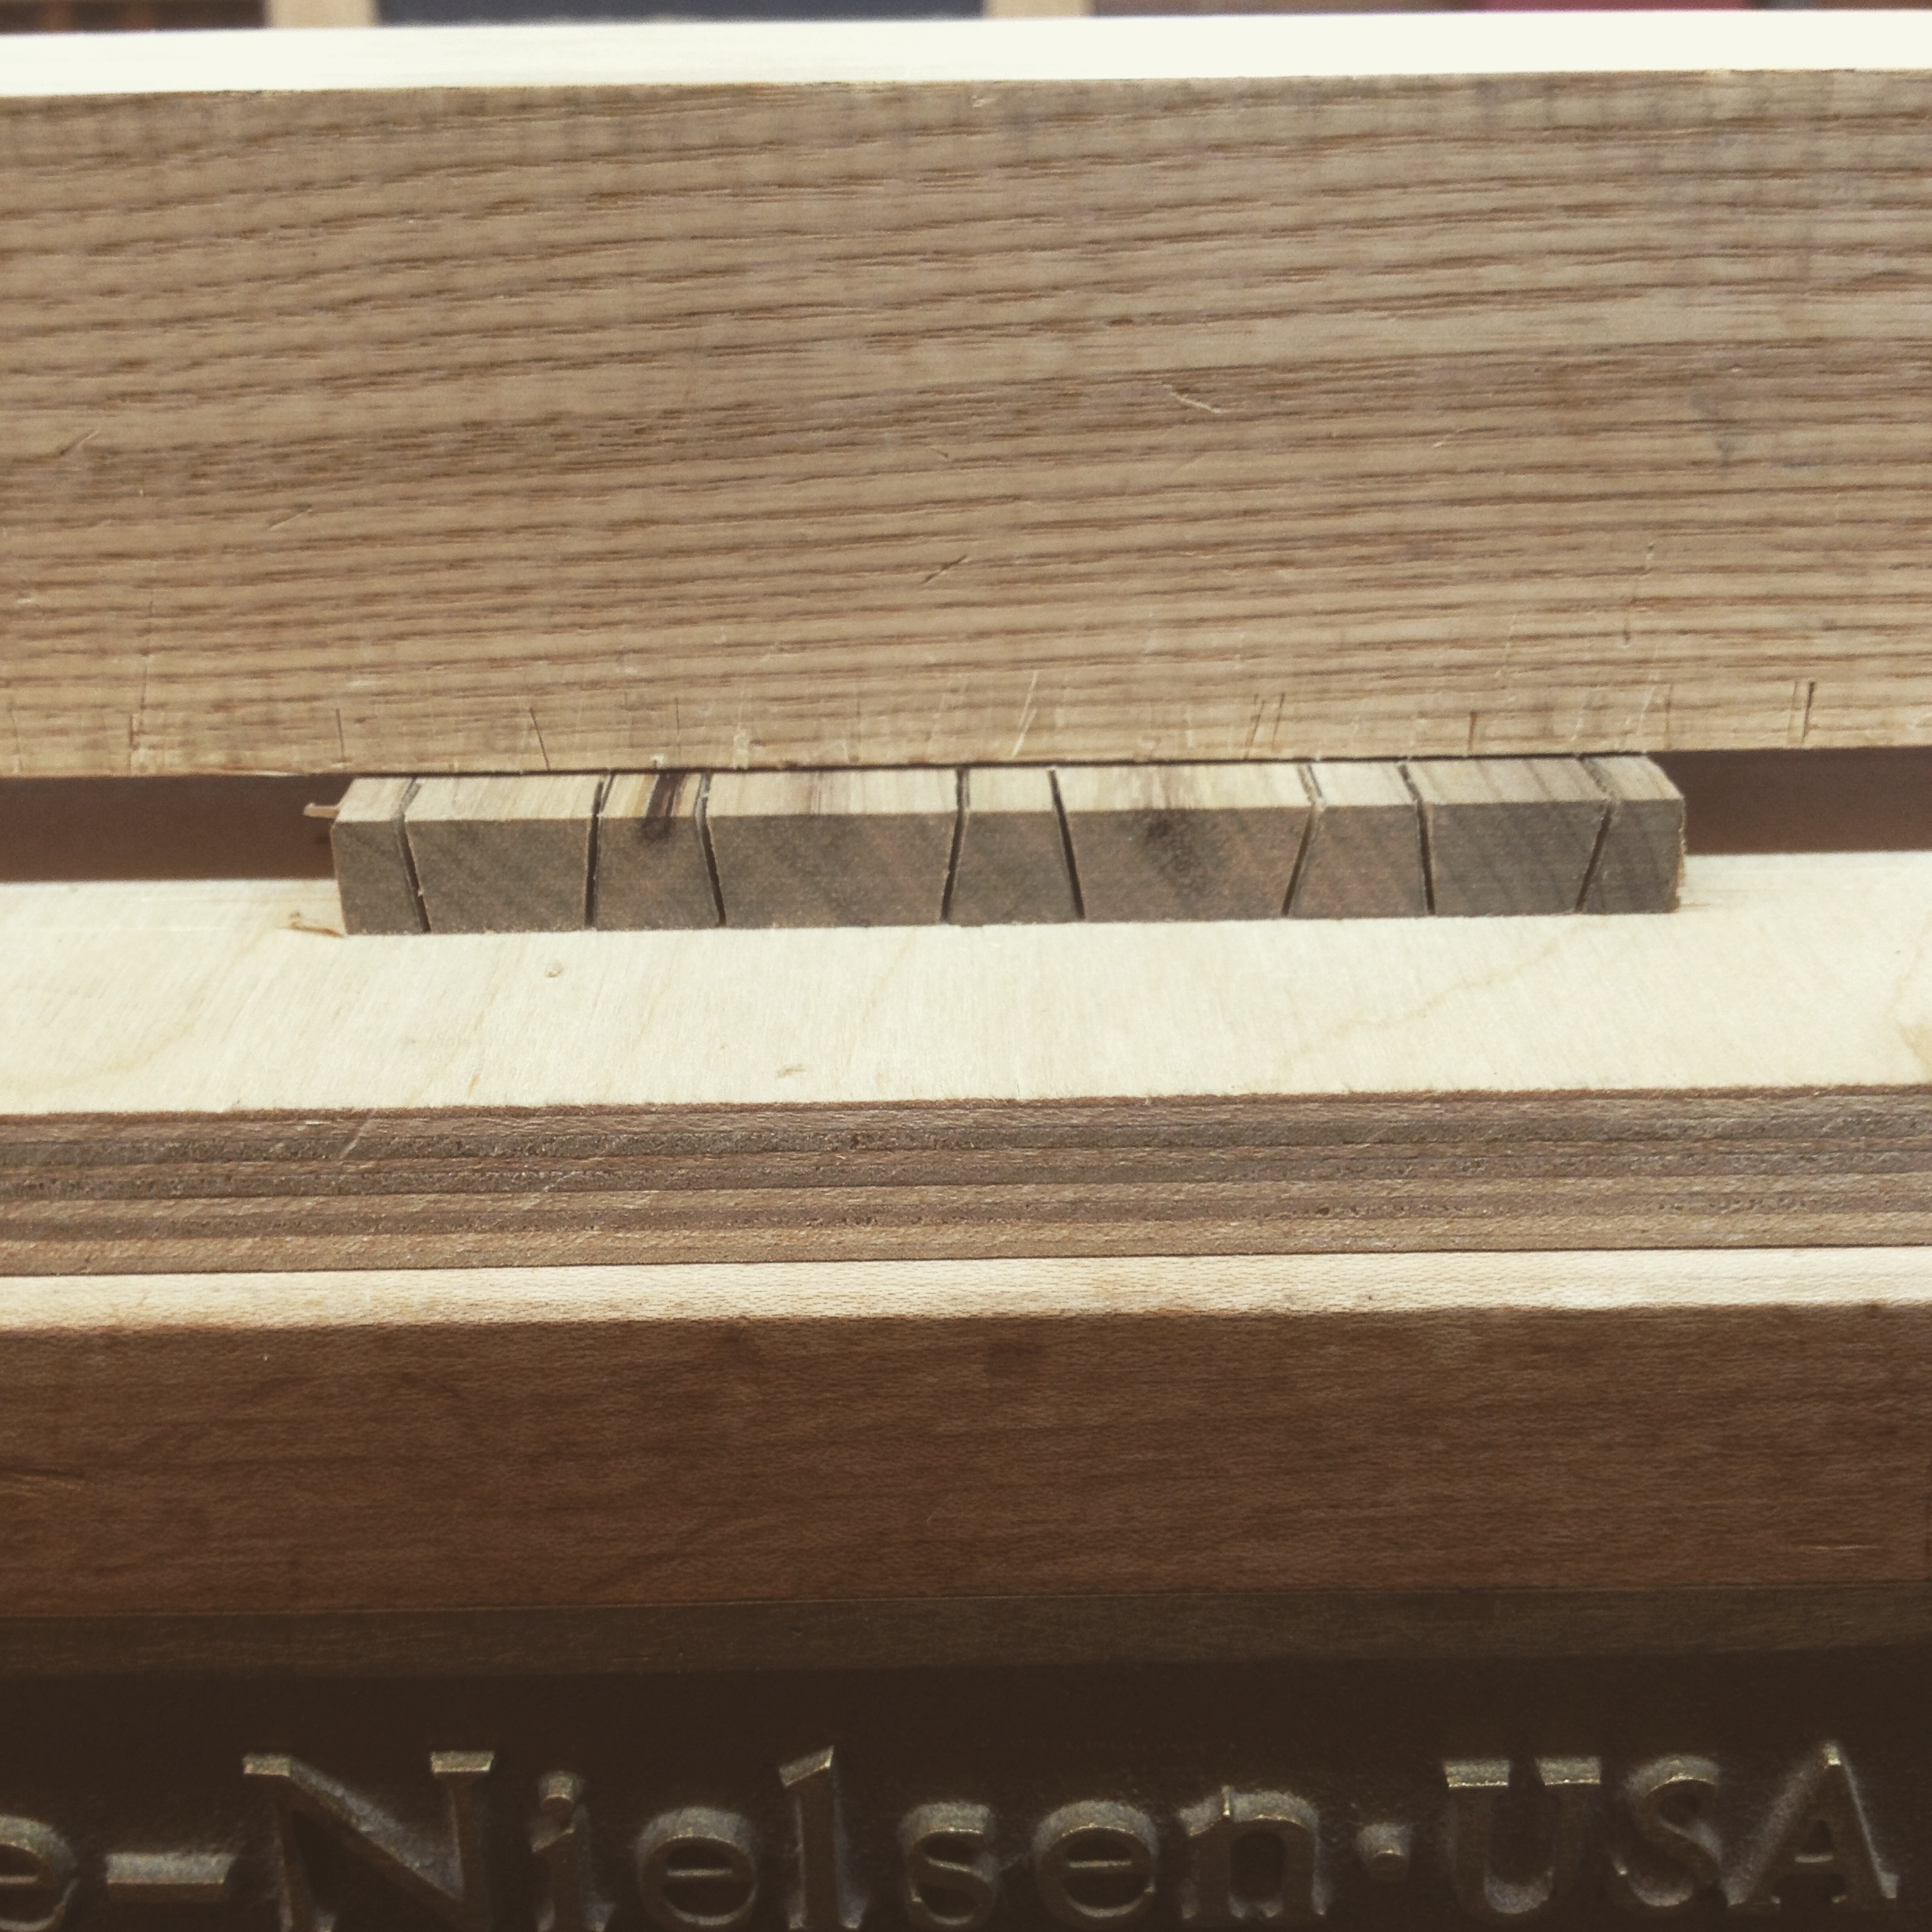
A quick word on brass. I try to make all of the parts that are in/on the my cabinets, and this includes things like stops, hold downs and hardware. I like to be able to make things like a brass tab/hold-down because I can make it to the exact proportion and shape that I believe looks best on a given piece. Here I am cutting tab/hold-downs for the HVD Cabinet. These will hold the base to the case of the cabinet.

The finished interior. Madrone, with very figured Koa drawer faces and Macassar Ebony pulls.
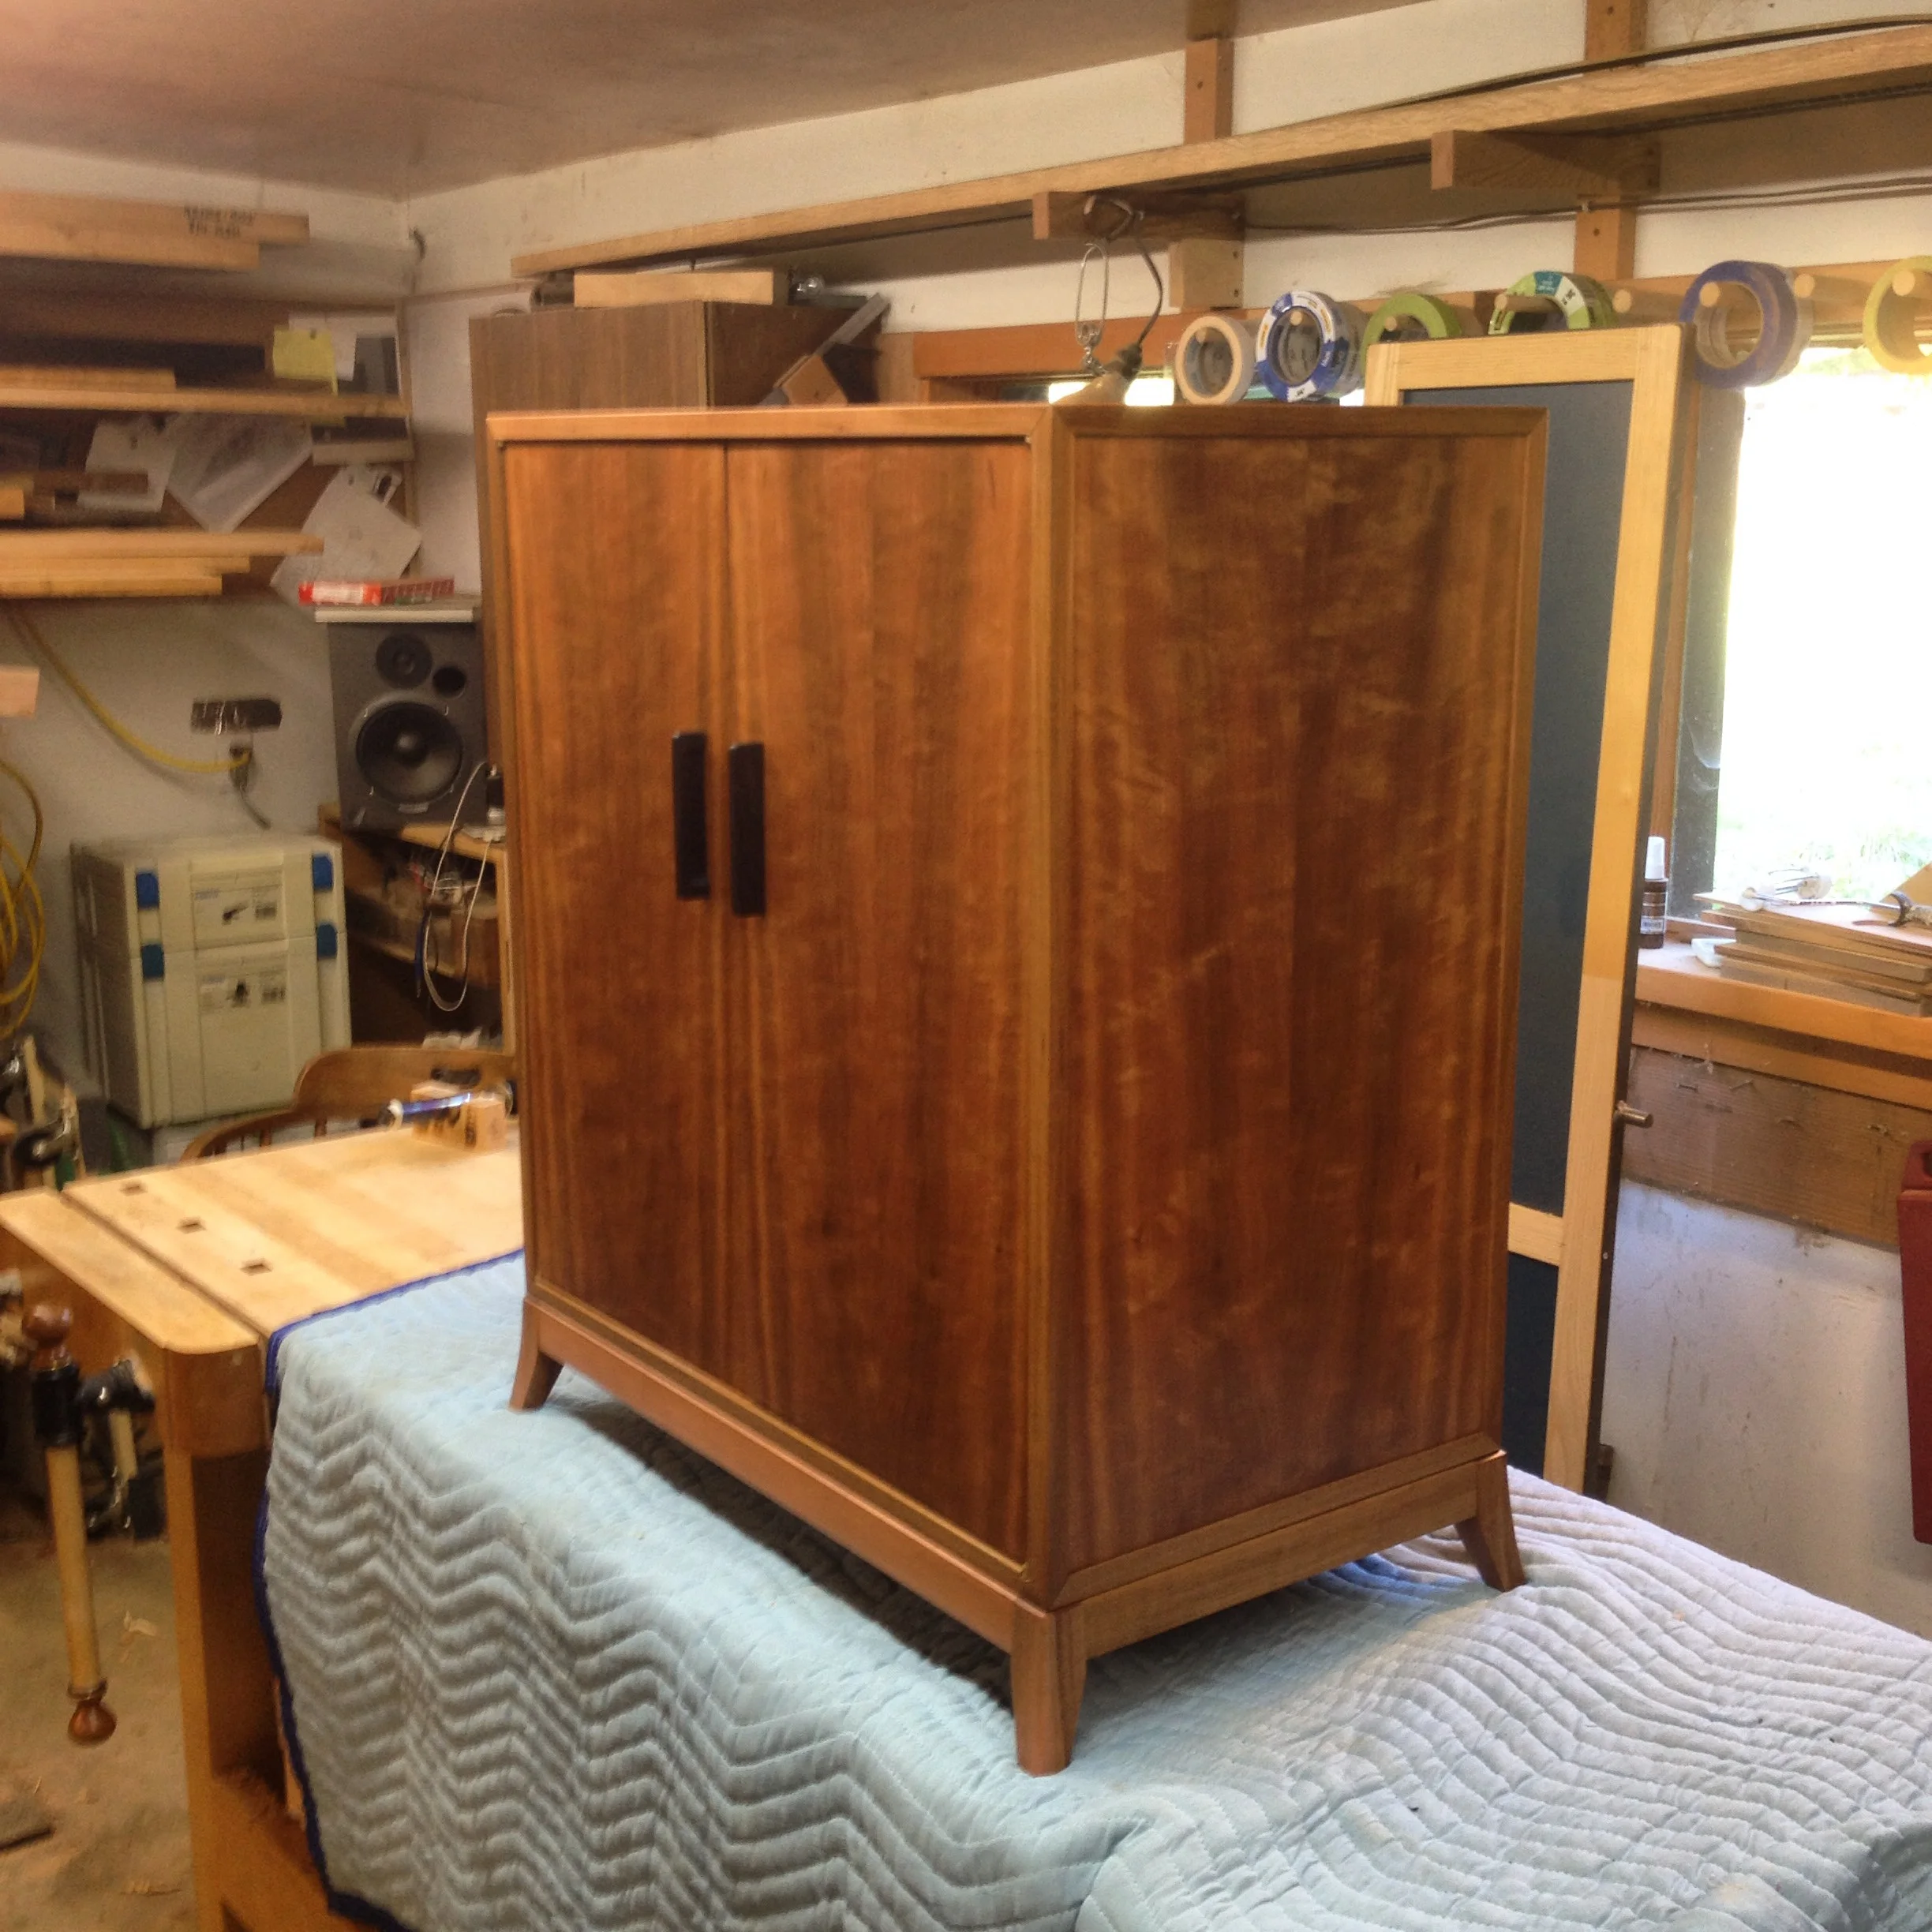
I always breathe a sigh of relief when all the parts come back together after finishing and it works just right. The doors ended up getting some nice Macassar Ebony vertical tabs with a little scoop out on the inside (thanks Terra for the inspiration)! I finished the top with OSMO Top oil (7 coats). The sides are finished with standard OSMO. The inside of the cabinet is shellac and wax - I don't like the insides of cabinets to smell of oil, and the shellac and wax are beautiful, but also very neutral. The drawer bottoms are of the cinnamon tree (and smell amazing). I am super pleased with how this cabinet came out. It is simple in design, but also has some really nice features that give it a bit of intrigue.